|
Batteries:
I prefer to use two batteries in my cars. On one I put a disconnect switch so that I only use both batteries if I need extra
starting power. I don't use an alternator, so two batteries are a must. I also run two separate ground cables from the battery
to the engine block at different places on it. I have had problems with the grounds before and this takes care of that problem.
Use at least 4 gauge cable, preferably 2 or 0 gauge. I have seen the cables melt to nothing before when poor quality cable
was used.
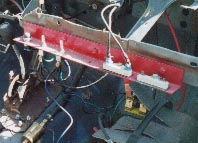
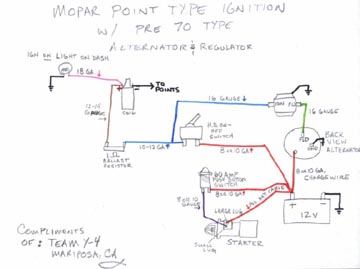
Wiring:
First of all, get rid of the factory key ignition and all factory wiring in the car. These are not very reliable and just
get in the way. I mount all of my wiring onto a piece of angle iron so that it is easy to move from car to car. I use one
toggle switch to run the electric fuel pump, one switch to run the ignition, and a push button starter. Make sure these are
all heavy duty. I run the ignition through a ballast resistor and have a spare in case the one resistor goes bad. The wiring
is fairly easy since I do not use an alternator. Make sure to tape all of the connections with electrical tape after crimping.
Solder them if possible. It sucks to lose because of a connection coming loose.
Gas tank:
I use a metal six gallon marine tank. I mount it in the back seat on the passenger side nearer the middle of the car. I
chain over the to and use a seat belt around it to keep it from moving from side to side. I also place a floormat under it
for a little bit of cushioning to it. Be sure to drill or punch out a few holes in the floor to let any spilled gas drain
out.
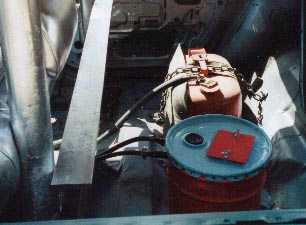
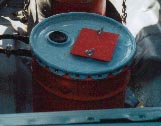
Transmission cooler:
In order for transmissions to work properly they need to keep running without overheating. Some people loop the lines at
the transmission with a piece of hose. Some people run their lines through their radiator. If this is done, a 10-12"
piece of the metal line should be cut out on both lines. It should be replaced with rubber hose. Be sure to give the hose
an extra 6-8" sso that it can bend and flex. Others run an actual transmission cooler with an electric fan mounted on
it for cooling. These all work, but the best way I've found is to make a homemade tranny cooler out of a five gallon metal
bucket. I coil about 12' of copper tubing inside of it and run the two ends through the bucket at the top to connect to the
transmission lines. I seal the lid back on but have a hole with a lid that I use to fill the bucket with ice. Before putting
the tubing in, I drill out about four holes to let the water drain out when the ice melts. The cooler is mounted in the back
seat on the driver's side nearer the middle. I fill the bucket up about ten minutes before the heat is going to start. I've
never had problems with a transmission overheating yet.
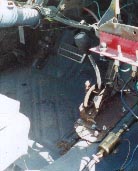
Floor shifter:
Get rid of the stock shifting linkage. It will break. shifter through the floor is the way to go. Some people use a rod
connected directly to the shifter on the tranny. I have taken this a little farther. I use an actual floor shifter. It
allows taking out park very easily. All the way forward is reverse, all the way back is low drive. This shifter works excellent
because when you hit a car in reverse, the momentum of the impact will throw the shifter into drive and you are on your way
without having to shift. The shift happens automatically. It also works going forward. Try it, you'll be amazed at how
well it works.
Steering wheel:
I like to put one of those steering wheel covers with the rubber knobbies on it over the wheel. I feel it helps with making
quick turns and keeping the car in control.

Seat belts:
I like to set my cars up with two separate seat belts. I only buckle one up while I'm driving. This way, if one seat belt
has to be cut for something, I still have another one that I can use.
Door-roof posts:
If the rules allow, use them. I have built different types of braces. An easy one to build is to get two 2-3' pieces of
metal tubing that can fit together. This tubing should be at least 3" in diameter. Weld a 5"x5" plate to
one end of each piece of tube. Slide the tubes together and then bolt the plates to the floor and the roof. I especially
like to have one on the passenger side so that nobody drives through that side of the car.
|

